3D Printing for Film Production
- Aidan Gray

- Jul 8, 2020
- 10 min read
Updated: Jul 9, 2020
An Intro to Additive Manufacturing Processes for Personal & Professional Use On Set
Intro
In the world of manufacturing, one of the few buzzwords taking the industry by storm in recent years is “additive” manufacturing. It's become the “4K” and “HDR” of the maker world - nearly ubiquitous when discussing both now and “The Future”. Almost everyone has heard of 3D printers and many have been fortunate enough to see them in action, but where does it apply to our industry? How can we leverage these newer technologies to make our lives a little easier, and why do you need one in your household? I’m by no means an expert, but I’ve assembled the following article as a qualified guide for some technical advantages & disadvantages of different processes, as well as many resources to learn more. This is a relatively technical intro, however, we have some more articles coming that focus on some great manufacturer case studies!
What is additive manufacturing?
For about as long as film equipment has been made, its traditionally been through a subtractive process, which is the umbrella term for “various controlled machining and material removal processes that start with solid blocks, bars, rods of plastic, metal, or other materials that are shaped by removing material through cutting, boring, drilling, and grinding”(1). In layperson terms, this means you start with a block of material and you chip away at it until you end up with what you want - chiseling a statue of David out of marble or cutting plywood down into panels would both be examples of subtractive processes. If you’ve ever used a 15mm or 19mm rod in a camera rig before, it most likely started its life as a slightly larger pipe or cylinder and was turned into the rod you’re familiar with by removing material along the external and internal diameter of the rod on a CNC lathe. In contrast to this, additive manufacturing builds an object by “adding material one layer at a time, with each successive layer bonding to the preceding layer until the part is complete”. For our 19mm rod, it would be pretty simple… You would only add material within the boundaries of the finished part in slices, sometimes leaving minimal additional material to be removed in a post-processing operation (2). The consumer-friendly term for additive manufacturing is what we’ve come to know and love as 3D-printing - in this article they may be used interchangeably.
What are the different types of 3D printing?
Oh… did you think it was going to be that simple? Even within 3D printing, there are a handful of different technologies & materials that all have different strengths and weaknesses. In this article, I’m only going to focus on the four most mainstream processes, but you can find a ton of information on all the processes in the reference section at the bottom. The four most prevalent additive technologies in use today are FDM/FFF (extrusion), SLA/DLP (resin), SLS (laser-sintered powder), and DMLS (metal powder) (3).
FDM/FFF (Extrusion) Fused-deposition modeling (FDM) is largely considered to be the most accessible, most user friendly, and arguably the “simplest” form of 3D printing - this is what will come to mind when most people think “3D printer”. In FDM, you start with a spool of thermoplastic filament which is fed into a heated extruder where it is deposited by a nozzle along a tool path. Examples of these machines would be the incredibly popular Creality systems, the historic MakerBot systems, the high-end MarkForged systems, and my personal favorite the Prusa i3 machines. All these systems are relatively similar and user friendly, with various differences between them in terms of capability. For instance, the MarkForged Mark Two can actually deposit continuous kevlar and carbon fiber reinforcements strategically throughout a nylon shell, creating parts that rival aluminum in strength. The trade-off is this system starts at around $15,000 and ~$190 per kilogram roll of Onyx filament. For comparison, the incredibly popular Creality Ender 3 Pro runs about $260 per system with filament ranging from $20-150 per kilogram.
“Mass production keeps the world divided between consumer and producer. De-massification of production may hasten the speed towards an era of prosumers.” - Michael Petch, “3D Printing: Rise of the Third Industrial Revolution"
The main benefits of FDM over any other 3D printing process is accessibility and cost-efficiency. This is currently the only process where you can spend well under $500 and go from idea to part on your own machine. Not to mention, FDM filament has almost become a common commodity - its available for next-day Amazon Prime delivery in most of the US, and can even be found in some hardware stores.
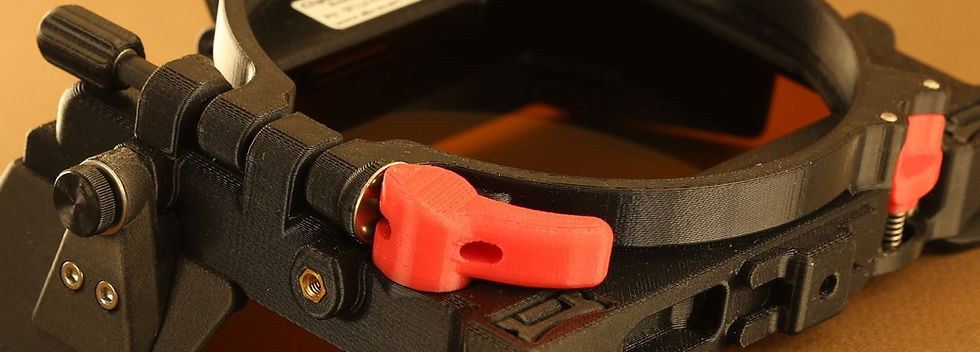
The one major disadvantage when it comes to FDM parts is whilst their X & Y planes are often limited to the strength of the material, force loading in the Z-axis (vertically) can results in parts up to 4x weaker (4) - this is simply a limitation of the technology. It's important when designing and manufacturing parts using FDM to take this into account (5), and in my experience, this is usually where failure occurs. Some examples of FDM-printed parts you may have seen on set would be the Media Blackout & Rencher Industries products, custom focus gears, the buttons on several cmotion products, as well as many of the products camera assistants & operators are personally printing - including Preston LightRanger masks, rod clips, rangefinder pan brackets, and focus motor gears. Another stand-out success of FDM printing is the Abracam series of matte boxes, designed by French operator Philippe Bordelais. These matte boxes, which are primarily designed for Steadicam & gimbal applications, pack an incredible amount of features into a tiny, robust package - as Bordelais says, “only the [3D printing] process can combine functionality, quality, reliability, evolutivity, weight and price”. As someone who really likes to beat up equipment, even I was skeptical about the endurance of an FDM matte box, but the ClipOne & EVO systems have really amazed me for those specialty jobs where you just can’t get away with a traditional matte box.
SLA/DLP/MSLA (Resin)
Despite being the first patented form of additive manufacturing, stereolithography (SLA) printing 6has only recently started catching on in the consumer markets. Developed by Chuck Hull in 1983, SLA works by exposing a photo-sensitive resin with a specific wavelength of light to cure the resin in very precise layers, slowly raising a platform to expose fresh unexposed resin for each layer. Because this process utilizes light to manufacture the object, the resolution achieved can far surpass any other current additive process, which makes SLA a favorite of many rapid-prototyping facilities. Higher-end SLA systems can achieve accuracy down to ~0.03mm (0.001”), or half the thickness of a regular human hair. One of the main reasons this process hasn’t caught on until recently is the relative expense of the SLA systems, as well as the toxicity of the resins required. Whilst the resins are still toxic (7) and need to be handled & disposed of as such, new printing systems utilizing UV displays (DLP) in place of lasers have brought cost and accessibility down dramatically. Common examples of SLA & DLP systems include the FormLabs systems, the Prusa SL-series, and the AnyCubic Photon.
Whilst its not super mainstream, the main benefit of resin-based processes is the resolution that can be obtained, with parts often coming off the machines requiring minimal post-processing work to look like “finished parts”. The major drawback of SLA printing is the difficulty in producing large-scale parts- most machines have relatively small build volumes in comparison to other technologies. Another 8 drawback that is slowly disappearing is the relative weakness of prints - like I said, new materials are being constantly developed and nowadays you can find a resin for just about any application (for a price, of course). Much like FDM processes, SLA/DLP are also rather finicky about part orientation in the manufacturing process. For almost all SLA parts, you will need to have it hover above the print surface to be dimensionally accurate, which means suspending it with support structures.
Besides adding material cost and cycle
time, these support structures will also need to be removed from the finished print and slightly sanded down in order to remove the imperfections they leave on the parts. I can’t personally say I’ve come across any professional products on set that I could tell were SLA/DLP printed, however, it is one of my favorite methods for printing myself 15mm/19mm cable clamps, camera port caps, and Preston LightRanger masks to name a few. In my opinion, they simply look better than FDM prints - not to mention the accuracy & smooth surface finish seriously helps when it comes to critical components like focus motor gears. I’m also certain it is fair to say several manufacturers (like Bright Tangerine) have these devices in house for internal prototyping of small components.
SLS/SLM (Powdered-plastic)
If you’ve ever ordered something from Shapeways, Xometry, StratasysDirect, or 3DSystems, you’ve probably heard of selective laser sintering (SLS). SLS manufacturing is very similar to SLA in that it utilizes a laser tracing a tool-path, however, it does this in a powder bed instead of resin. The benefit of this process over many others is it opens up an entire world of complex geometry without limitations toward part orientation or support structures (9) - these are the two main drawbacks of every other method mentioned in this article. For this reason, this is one of the best solutions for out-of-the-box ideas, including extremely intricate “organic” designs. Of course, as with everything, this comes at a pretty big financial burden - most of these industrial machines run well over $100,000 (10) per unit which keeps them out of the hands of most consumers. That said, there has been a massive explosion in “print-on-demand” services that offer to print designs on these machines and ship them directly to the consumer. In terms of professional products printed on SLS machines, there is actually an increasing number of printed products entering the mainstream market. Tiffen has slowly been testing the feasibility of SLS-printed products in their prototype Volt systems, which featured SLS printed adjustment pots, as well as their new Fawcett ExoVest, which shipped to beta-users featuring printed guides for the hip pads. Other common products to see on set are the Panavision cable clips, Gizmo/CineRT accessories, as well as the large collection of assistant-designed products - such as Ryan Summersett’s Dust-Off Lock, Aichlmayr/Quintero Focus Solutions Battery Holders, & Kevin Miles’s Preston Accessories. Most of these products are printed in a nylon-11 or nylon-12 powder, which has the benefit of tensile & impact strength, as well as relative resistance to temperature warp.
DMLS/SLM (Metal 3D Printing)
I’m not going to really go too in-depth here as this technology is relatively new, rapidly changing, and relatively cost-prohibitive for film products, but DMLS stands for direct metal laser sintering. As the name implies, this is one of the only direct methods of additively producing solid metal parts. Currently, common materials offered include two types of stainless steels, casting-quality aluminum, Inconel, and copper. It works very similarly to SLS, but instead of a nylon powder, it's utilizing a very thin layer of metal powder (12). The main applications for DMLS printing currently are the aerospace and medical fields, where low-quantity, low-mass, high-strength parts are often needed in a relatively short turnaround.
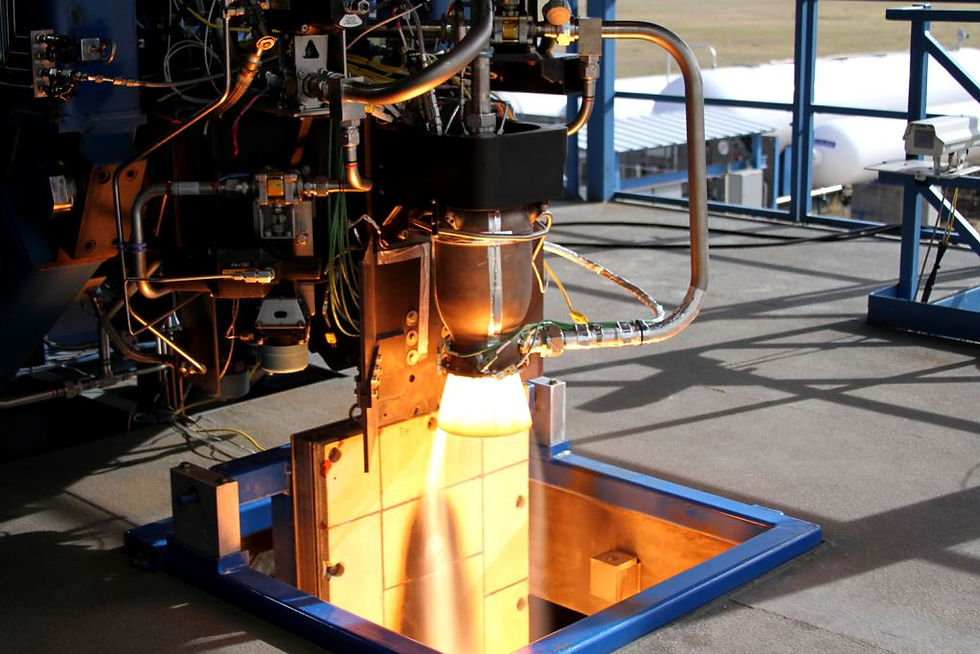
SpaceX, one of the major champions of DMLS, have used it to produce the Main Oxidiser Valve (3) body of their Merlin 1D engines after a successful first launch on January 6, 2014. They’ve also used it to DMLS to produce print the engine chamber for their regeneratively-cooled SuperDraco, which would not have been possible without the internal structures that DMLS allowed them to the implant.
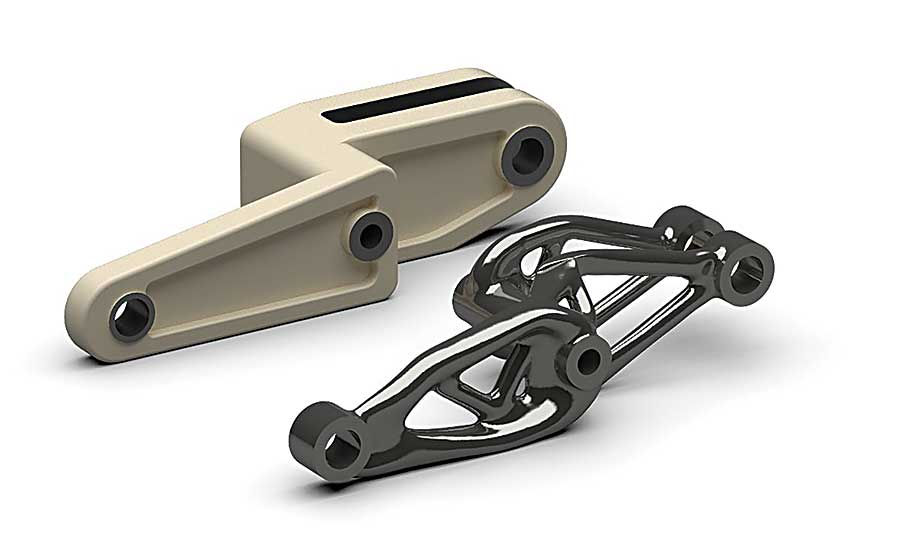
DMLS has also enabled designers to really take advantage of advanced CAD & AI algorithms, like topology optimization (14) and generative design (15), to maximize strength and minimize material in a way that doesn’t compromise the integrity or safety of the parts. Whilst this is also relatively new technology, you can slowly see film manufacturers implementing this into their products using subtractive processes, such as with ARRI’s most recent release of their dovetail plates. I’ll likely do an entire article on the benefits of design optimization alone, as its really where we can push the boundaries of what is safe, comfortable, and possible for camera departments on set.
Which process is right for you?
When it comes to making your own parts, this is a really big question. I usually start with defining the goals of my design (16) and then researching the limitations of the processes. Fortunately, we live in an age where a simple Google search will bring up most of the information you’d ever need to make this decision, but the onus is still on you to critically think about all the elements of the problem.
A personal example is a Teradek Sidekick mount I printed a few years ago - I ended up
printing it on my FDM machine in PETG plastic, which has a relatively low heat deflection point (aka resistance to temperature warp) of ~80 ºC. After using it for about a year, it started to completely warp and separate from the battery plates due to the heat generated by the receiver, even after modifying the design to allow better passive cooling. Eventually, after multiple failures, this led me to look into SLS printing in nylon-12 via an online service as nylon has a much higher heat deflection point (~150°C) and the parts have been great since! Had I properly researched the processes available, I probably would’ve come to this conclusion faster, but with how relatively inexpensive consumer 3D printing has become, I personally think small failures like this are ok and part of the process…
Another example is my recent prototype for a new RED camera accessory. I originally printed all my parts in FDM PLA just to check fit and aesthetics, and then I ordered a DMLS version made to check function. After seeing the DMLS version and getting to use it on set, it gave me a lot of insight into some small tweaks that could be made the improve it for an eventual CNC run. Had I left it in a thermoplastic, it probably wouldn’t have been able to withstand the beating that us camera folk put our mounting hardware through and therefore wouldn’t have enabled me to really see it put to the test!
Conclusion
Hopefully, this gave you a good overview of some of the processes being deployed in the additive manufacturing space and how you might be able to leverage some of them for your own projects. Upcoming, we have some interviews with some of the companies and people mentioned in this article, as well as a couple of articles focusing on the specific problems that arise when it comes to designing products for the film industry. Definitely let me know your thoughts and what you’d like to see more of!
Wanna read it on the go? Just download the PDF:
Footnotes:
(11) Production model of the ExoVest features injection-molded rubber guides
Misc. References
Joshi, Sunil & Sheikh, Abdullah. (2015). 3D printing in aerospace and its long-term sustainability. Virtual and Physical Prototyping. 10. 1-11. 10.1080/17452759.2015.1111519
Aboulkhair, Nesma T.; Simonelli, Marco; Parry, Luke; Ashcroft, Ian; Tuck, Christopher; Hague, Richard (December 2019). "3D printing of Aluminium alloys: Additive Manufacturing of Aluminium alloys using selective laser melting". Progress in Materials Science. 106: 100578. doi:10.1016/j.pmatsci. 2019.100578 Into


Comments